Wednesday, January 30, 2013

Cheesecake Cups

To know how far behind I am on posting, I made these Cheesecake Cups for dessert for Christmas Eve.  Yes, that was almost a month ago!  Every Christmas Eve we go to my cousin's house in CT.  She asked me to bring dessert.  My other cousin's wife always brings some cookies, so I didn't want to make more.  But I also didn't want to bake a cake.  I ended up making an Eggnog Pie and these Cheesecake Cups.  I know my family loves cheesecake so they would get eaten. I thought that with the cookies and pie, these cups would be small enough that everyone could sample a little bit of everything and not feel like they had to eat a whole piece of cheesecake.  The store was out of regular Nilla Wafers so I ended up buying mini ones and used mini cupcake wrappers.  I left the original recipe amounts and cooking time below though.  These were a hit!  Everyone enjoyed them and they were really easy to make.
Cheesecake Cups
recipe slightly from allrecipes.com, courtesy of LOOPDHERB

Ingredients:
16 vanilla wafer cookies
2 (8 ounce) packages cream cheese, softened
3/4 cup white sugar
2 eggs
1 teaspoon vanilla extract
1 can cherry pie filling
1/2 cup mini chocolate chips

Directions:
1.Preheat oven to 350 degrees F (175 degrees C). Line muffin pans with cupcake papers.

2.Place one wafer cookie in the bottom of each cupcake paper. In a medium bowl, cream together cream cheese and sugar. Beat in eggs and vanilla until smooth. Pour over wafers in cupcake papers.

3.Bake in preheated oven 15 minutes, until golden and set.

4. Add either cherry pie filling or mini chocolate chips to top.

Family Rating: 2 thumbs up.

Monday, January 28, 2013

Might Have Missed Monday: Cinnamon Roll Sugar Cookies

It's Monday again, so I'm sharing another recipe post from my blog that my family enjoyed a lot that you may not have seen.  I made these cookies last December right before Christmas.  This recipe makes a ton of cookies so I was able to use one batch for both my supper club cookie exchange and for a friend's annual Christmas party cookie competition.  Unfortunately, these cookies didn't place in the competition......but I think it's just because they weren't really "Christmasy."  Taste-wise my family loved them and they'd get a 2 thumbs up.  However, when I made them the dough was a bit sticky and hard to work with.  Luckily, my more patient husband helped me with them. So based on work involved and difficulty I gave them a 1 1/2.  I'd definitely make these again though.


Cinnamon Roll Sugar Cookies
recipe from Picky Palate

Yield:  approximately 6 dozen

Ingredients:
2 Cups sugar
1 Cup butter, softened
3 eggs
1 teaspoon vanilla
1 Cup sour cream
6 Cups flour
2 teaspoons baking soda
2 teaspoons baking powder
1/4 teaspoon salt
12 tablespoons softened butter, (slice 2 Tablespoons 6 times totaling 12 tablespoons)
1 1/2 Cups packed light brown sugar, divided into 1/4 Cups
1 1/2 Tablespoons ground cinnamon, divided

Frosting:
8 oz softened cream cheese
1/2 Cup powdered sugar
2-4 Tablespoons milk, to thin icing

Directions:
1. In a mixer, cream the sugar and butter. Add eggs, vanilla and sour cream until well combined. Slowly add in the flour, baking soda, baking powder and salt until well combined.

2. In 2 batches, place in plastic wrap in a disc shape and chill for at least 2 hours for best results.

3. Once chilled, cut each disc into thirds and roll into a 1/8 inch thick oval, about 12 inches X 5 inches. Spread each rolled pieces of dough with 2 Tablespoons softened butter, 1/4 Cup packed brown sugar and 1/4 teaspoon cinnamon. Start rolling from the long end closest to you, rolling into a log shape. Using a sharp knife, cut 1/2 inch pieces of dough placing pieces onto a parchment lined baking sheet. Bake at 350 degrees for 9-11 minutes. Remove and let cool for 5 minutes before removing from baking sheet.

4. To prepare frosting, beat the cream cheese until softened and smooth, slowly add powdered sugar and milk until desired consistency. Frost cookies then place in refrigerator until ready to serve.

Family Rating: 1 1/2 thumbs up.

This post is shared at:
Manic Monday Party @ Bobbi's Kozy Kitchen
Tasty Tuesdays @ 33 Shades of Green
The Bulletin Board @ Mrs. Happy Homemaker
Totally Tasty Tuesdays @ Mandy's Recipe Box

Friday, January 25, 2013

Baked Orzo with Chorizo and Spinach

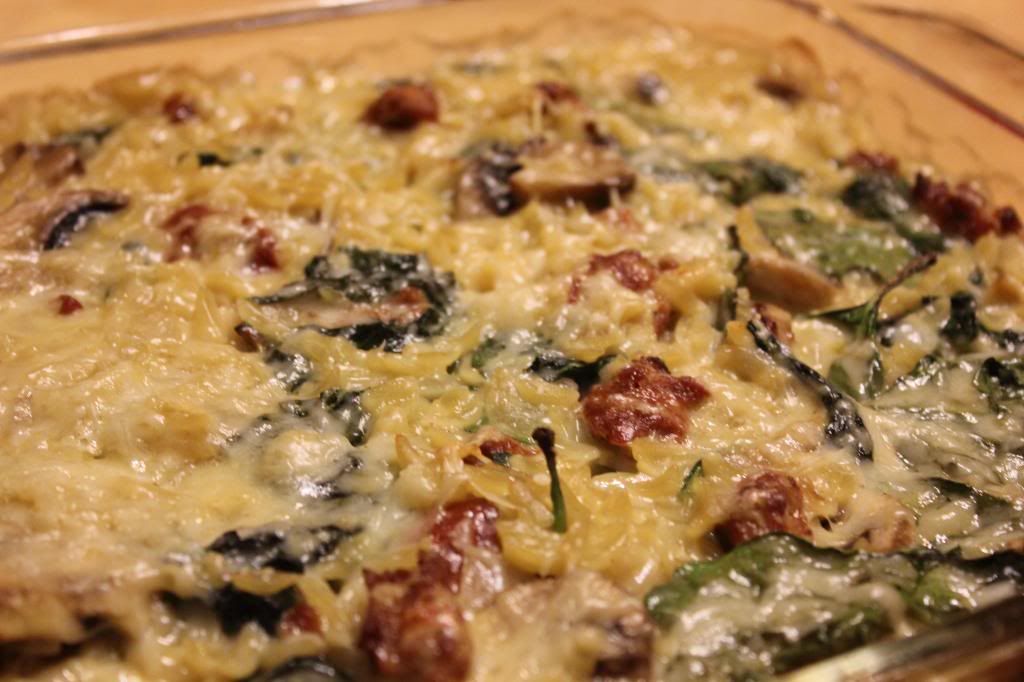
I had some leftover chorizo that I wanted to use up.  When I saw this recipe I knew I wanted to try it.  This was really easy to prep and then cooks in the oven for 25 minutes.  It was a perfect weeknight meal for a cold winter's night.  The kids picked out what they wanted to eat (chorizo, yes, spinach and mushrooms, no) but did try one bite of everything.  My husband and I really liked this dish!  I could have halved it so we didn't have as many leftovers as we did, but it was eaten up for lunches throughout the week.  I would definitely make this dish again!

Baked Orzo with Chorizo and Spinach
recipe from Mary Ellen's Cooking Creations

Ingredients:
4 cups chicken broth
1 pound orzo pasta
Chorizo; I used 2 links, each was about 6 inches long.
1 onion, chopped
2 cloves garlic, finely chopped
8 ounces mushrooms, chopped
1 cup white wine
1/2 cup heavy cream
1 c shredded cheeses - I used a mix of mozzarella, Parmesan, and asiago
More Parmesan cheese, for the topping, about 1/4 c
6 oz fresh spinach, roughly chopped
1/2 teaspoon salt
1/2 teaspoons freshly ground black pepper
1/2 cup bread crumbs

Directions
Preheat the oven to 400 degrees F. Grease a 9 by 13-inch baking dish.

Bring the chicken broth to a boil over medium-high heat in a medium saucepan. Add the orzo and cook until almost tender, about 7 minutes. Pour the orzo and the broth into a large bowl. Set aside.

Meanwhile, heat 2 tbsp olive oil over medium heat in a medium skillet. Crumble the chorizo into the pan and cook until browned, about 8 minutes. Add the onions and garlic, saute 3 minutes. Add the mushrooms, saute 2 minutes.  Add the wine, stirring to scrape up all the brown bits. Let simmer until reduced by half, about 5 minutes. Add the sausage mixture to the orzo in the large bowl. Stir.  Add the cheeses, stir. Pour in the cream and stir to combine everything.

Pour the mixture into greased baking dish. Sprinkle with bread crumbs and Parmesan cheese.

Bake uncovered until golden, about 25 minutes. I turned on the broiler for the last minute or two.

Family Rating: 2 thumbs up.

This post is shared at:
Full Plate Thursday @ Miz Helen's Country
Showcase Your Talent Thursday @ What's Cooking, Love?
Food-Spectacluar Friday @ Not Your Ordinary Recipes
Foodie Friday @ Simple Living and Eating

Wednesday, January 23, 2013

Ravioli and Sausage Skillet

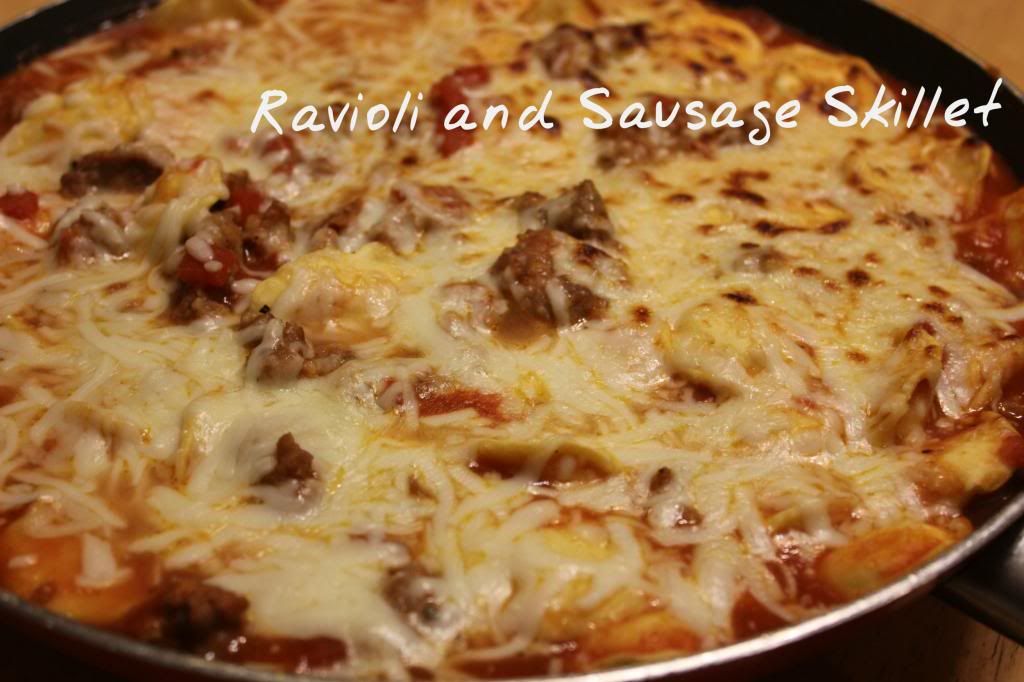
Ravioli makes for a quick and easy weeknight meal. Especially, the store-bought frozen, already made kind!  This dish is a perfect winter meal.  It takes basic ravioli and steps it up a little into a hearty and filling dish.  This meal was super easy to make and something that the whole family enjoyed.  While not gourmet it's a step up from ravioli and a jar of pasta sauce!  This made enough that allowed us to have plenty of leftovers.

Ravioli and Sausage Skillet
recipe adapted from Dashrecipes.com

Yield:  8 servings

Ingredients:
1 Tbsp extra virgin olive oil
1 lb. sweet Italian sausage
1 (14.5-oz) can petite diced tomatoes
1 (8-oz) can tomato sauce
1 Tbsp tomato paste
1 Tbsp Italian seasoning
1 tsp garlic powder
1 tsp onion powder
1 tsp kosher salt
½ tsp fresh ground black pepper
1 ½ cups water
8-oz shredded Italian cheese blend, divided
25-oz frozen mini round cheese ravioli
4-oz Parmesan cheese, grated
6 basil leaves, chopped

Directions:
1. In a large skillet over medium high heat; add olive oil. Remove sausage from casings and crumble into skillet. Stir occasionally until cooked through.

2. Add diced tomatoes, tomato sauce, tomato paste, Italian seasoning, garlic and onion powders, salt and pepper. Mix to combine. Add water, stir well. Add ravioli and cover. Cook 10 minutes or until ravioli is tender, stirring occasionally.

3. Preheat oven to broil.

4. Add 4 ounces of Italian cheese blend to skillet and gently fold in to combine. Sprinkle the remaining 4 ounces over the top of the skillet.

5. Place skillet in oven for 2-4 minutes until the top is bubbly and golden brown.

Family Rating: 1 1/2 thumbs up.

Monday, January 21, 2013

Might Have Missed Monday: Fish Tacos with Honey-Cumin Slaw and Chipotle Mayo

Here's another recipe that you "might have missed" from my first year of blogging.  My family loves tacos.  I don't make fish as much as I'd like, probably because I try to limit my trips to the grocery store, and I only make fish the day I buy it.  Seeing these again though reminds me of how tasty they were.  I may have to make these again soon, since it's been over a year since I first made them.  I know the ingredient list is a little scary (i.e. long!).  And this does take a little time to prepare, with the breading and frying of the fish, prepping the mayo, making the sauce, etc.  However, it is really tasty!  I ended up brushing the honey-cumin sauce on the fish for the kids, but didn't give them the slaw or mayo. It definitely had too much a kick for them. They both ate all of their tacos and my daughter even asked, "Mmm, what's this tangy, sweet sauce?" I served this with yellow rice and frozen, steam-in-a-bag veggies.


Fish Tacos with Honey-Cumin Slaw and Chipotle Mayo

recipe from allrecipes.com by SCAREY76

Ingredients:
1 pound tilapia fillets, cut into chunks
1/2 cup fresh lime juice
1/3 cup fresh lime juice
2 tablespoons honey
1 tablespoon vegetable oil
1 teaspoon ground cumin
1/2 cup mayonnaise
2 chipotle chilies in adobo sauce
1 tablespoon adobo sauce from chipotle peppers
1/4 teaspoon salt
1/8 teaspoon cayenne pepper
1/3 cup all-purpose flour
2 eggs, lightly beaten
2 cups panko crumbs
salt and ground black pepper to taste
1 cup vegetable oil for frying
2 cups 3 color coleslaw blend
1 cup minced fresh cilantro leaves
8 (7 inch) flour tortillas, warmed

Directions:
1.Place the tilapia chunks in a flat dish and pour 1/2 cup lime juice over the fish. Cover, and refrigerate at least 4 hours.

2.Meanwhile, make the honey-cumin sauce by whisking together 1/3 cup lime juice, honey, vegetable oil, and ground cumin a small bowl. Set aside until needed.

3.To make the chipotle mayonnaise dressing, place the mayonnaise, chilies, adobo sauce, 1/4 teaspoon salt, and cayenne pepper together in the bowl of a food processor. Pulse until smooth. Cover, and refrigerate until needed.

4.To bread the fish, place the flour, eggs, and panko crumbs in three separate shallow dishes. Season the fish with salt and pepper to taste. Dip the fish pieces first in the four, coating evenly, and shaking off any excess. Dip next in the eggs, and last in the panko crumbs, patting the pieces to help the breadcrumbs hold. Set the fish aside on a plate.

5.To cook the breaded fish, pour 1 cup vegetable oil into a skillet to 1/4 inch deep. Heat the oil to 365 degrees F (185 degrees C) over medium heat. Cook the fish, turning until all sides are golden brown, and flesh is easily flaked with a fork. Drain on paper towels. Brush the fish with the honey-cumin sauce.

6.Mix the coleslaw and cilantro together in a bowl. Reserve 1/4 cup of the chipotle mayonnaise dressing, and pour the remaining dressing over the coleslaw mixture. Toss to coat evenly with the dressing.

7.Place the tortillas on a flat surface, and spread each with 1 tablespoon reserved chipotle mayonnaise dressing. Divide the fish between the tortillas. Top with the cilantro coleslaw.

Family Rating: 2 thumbs up!

This post is being shared at:
Totally Tasty Tuesdays @ Mandy's Recipe Box
Tasty Tuesdays @ 33 Shades of Green
Back for Seconds Social Link Party @ Back for Seconds
Wednesday Whatsits @ White Lights on Wednesdays

Friday, January 18, 2013

Mexican Chicken Quiche

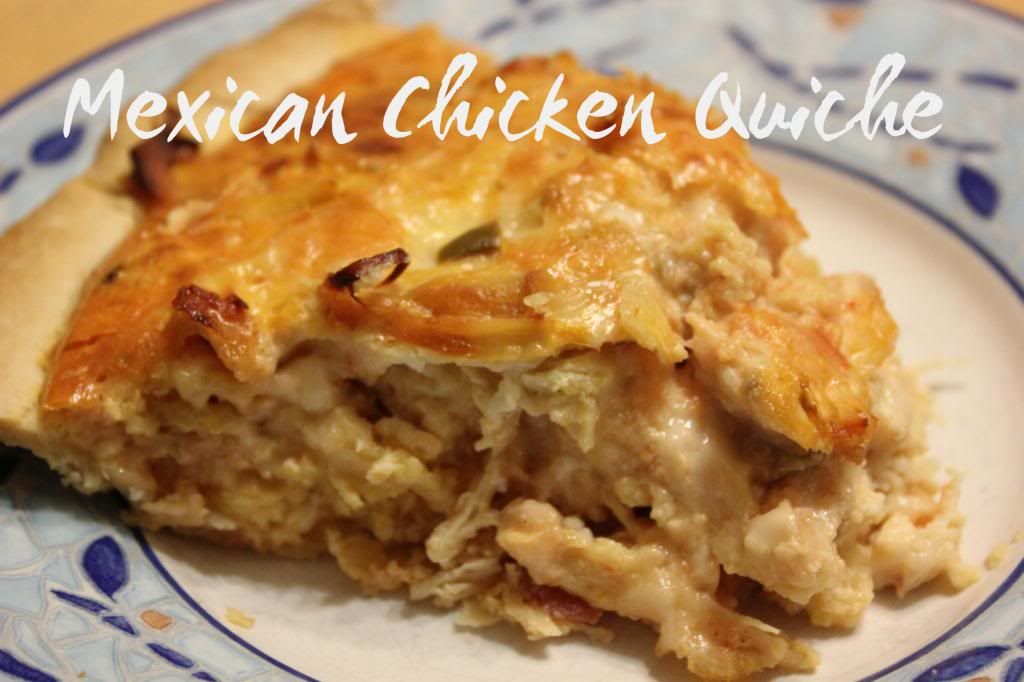
Our family loves Mexican food.  More specifically we love tortilla chips and salsa.  Add some guacamole and sour cream and I'm in heaven!  I found this recipe and thought that the kids would enjoy it.  It included their favorite chips and salsa as well as eggs which they also love.  Minus the pre-cooking of the chicken, this dish was so easy to put together.  Unfortunately, it does require an hour of cooking time, so this may not be an appropriate meal for a busy weeknight.  We all (including the kids!) enjoyed this dish and I'd make it again.


Mexican Chicken Quiche
recipe slightly adapted from Cassie Craves, adapted from Pillsbury

Ingredients:
1 pie crust
4 eggs
1 cup milk
1 1/2 cups cooked shredded chicken
1 1/2 cups broken tortilla chips
3 cups shredded Mexican-blend cheese
1 cup salsa
Sour cream, salsa, and cilantro for serving

Directions:
1. Preheat the oven to 350 degrees. Place the pie crust in a 9-inch pie pan.

2. In a medium bowl, beat the eggs with a wire whisk. Beat in the milk. Stir in chicken, tortilla chips, cheese, and salsa. Pour into the crust-lined pan.

3. Bake 55 to 65 minutes, or until crust is light golden brown and a knife inserted in center comes out clean. Let stand 10 minutes before serving. Cut into wedges. Sprinkle with cilantro and serve with sour cream and salsa.

Family Rating: 1 1/2 thumbs up.

This post is shared at:
Full Plate Thursday @ Miz Helen's Country Cottage
Creative Thursday @ Michelle's Tasty Creations
Foodjacabradalidocious Friday @ Not Your Ordinary Recipes

Wednesday, January 16, 2013

Crunchy Coconut Shrimp Tacos

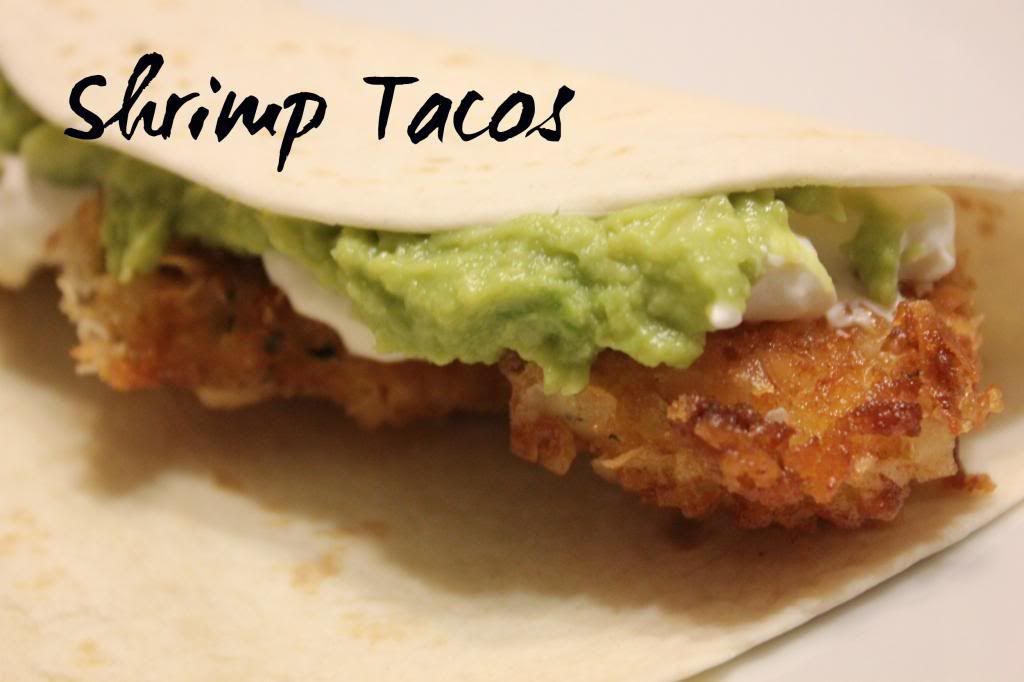
At a recent supper club dinner that the kids attended one of the members made a coconut shrimp.  I could not believe how quickly my kids were gobbling them down!  So when I saw this recipe I knew that they would love these tacos.  They love tacos and filled with crispy, coconut shrimp.....yum!  Originally I was planning on making  homemade guacamole to serve with these.  While at the grocery store I saw that Wholly Guacamole was on sale and would end up being cheaper (and easier!) than buying the ingredients for and making homemade guacamole.  It was our first time trying it and....I'm hooked!  It was really tasty and addicting!  I highly recommend if you haven't tried.  My husband commented that the shrimp were so good by themselves, which I have to agree with!  However, I love putting sour cream and guacamole on things so I enjoyed them in the taco as well!  I served this with some yellow rice which made for another meal that we all enjoyed.

Crunchy Coconut Shrimp Tacos
recipe from Miss Delish

Serves 6

Ingredients:
1 lb large Shrimp
3 Cups Panko Breadcrumbs
2 Cups Sweetened Flaked Coconut
1 cup Flour
2 Eggs
2 Tbsp Water
Salt and Pepper
Canola Oil (for Frying)
Tortillas

Directions:
Pour the Flour into a shallow dish and season with salt and pepper. Beat the eggs and water in another shallow dish. In one last dish add the Panko breadcrumbs and coconut. Bread the prawns by first coating in the seasoned flour, then dipping in the egg and lastly coating with the coconut and panko mix, make sure to press the panko/coconut on to each prawn to coat well.

In a heavy bottom pot pour about 2 inches of oil. Heat over medium high heat, it’s ready when you drop in a breadcrumb and it sizzles and bubbles right away. Fry the prawns in small batches, and set aside on a stack of paper towels to absorb excess oil.

While still hot, season with salt to taste.

Serve in warmed tortillas with salsa, guacamole and sour cream!

Family Rating: 2 thumbs up!

This post is being shared at:
Back For Seconds Social Link Party
Wednesday Whatsits @ White Lights On Wednesday