Showing posts with label allrecipes. Show all posts

Saturday, May 4, 2013

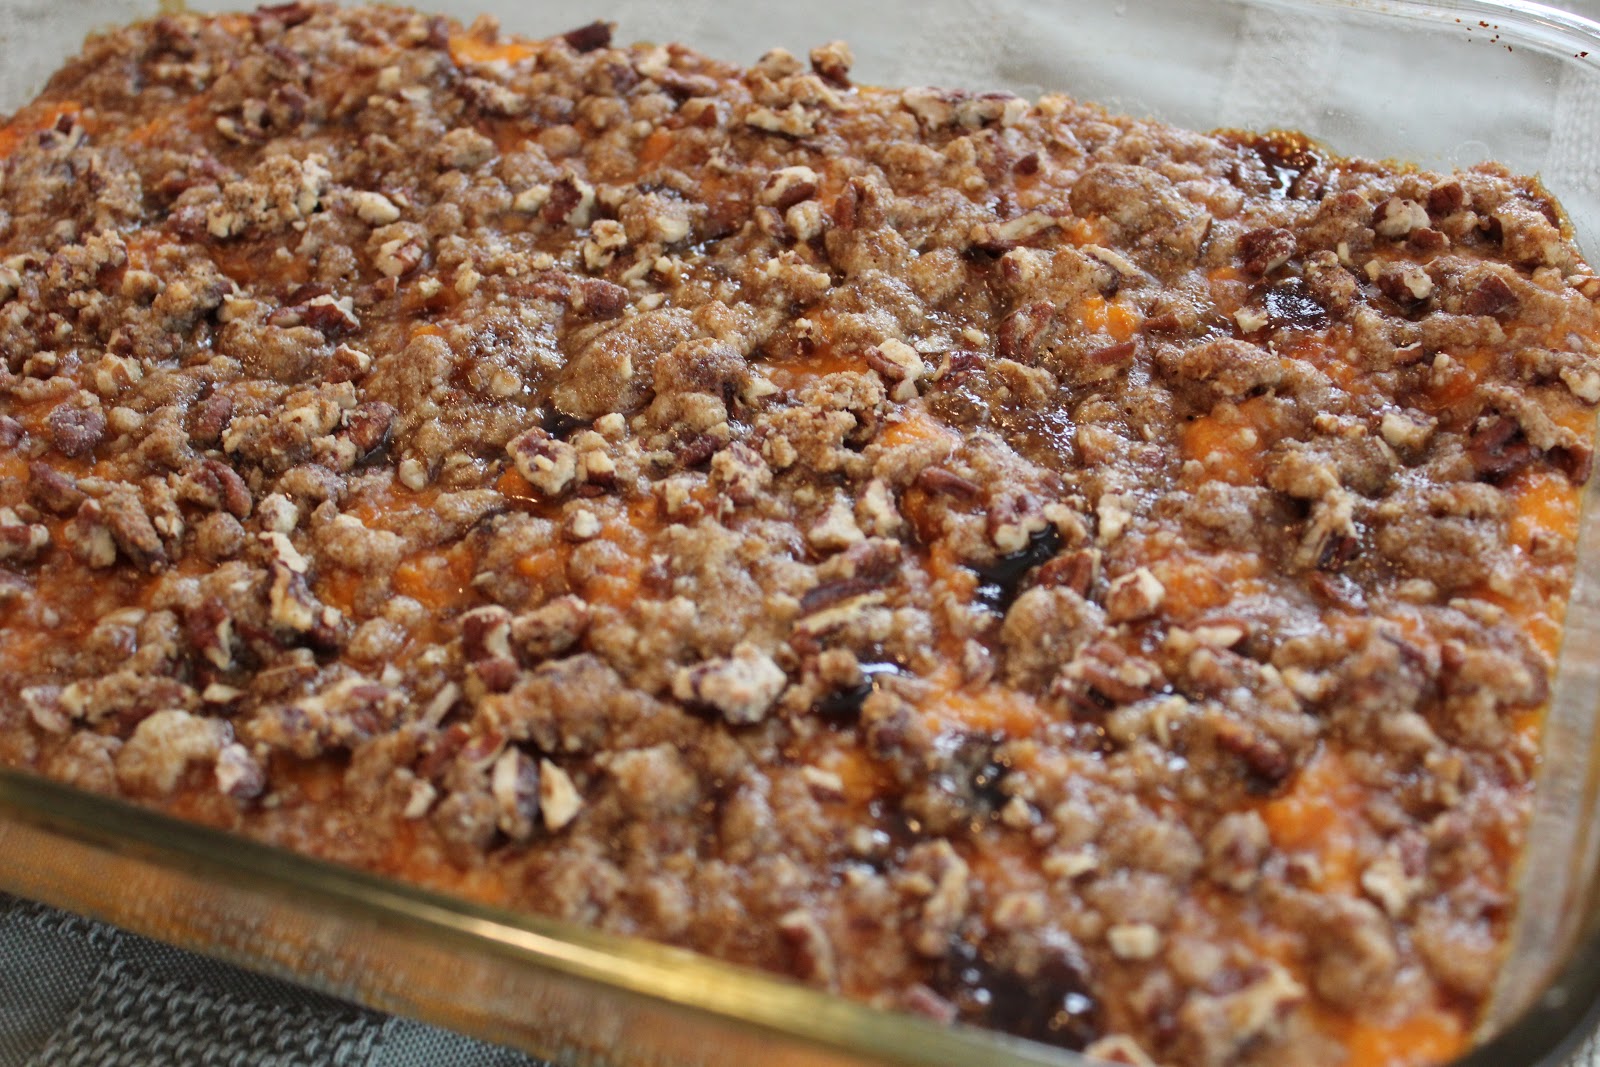
Yummy Sweet Potato Casserole

My daughter's birthday was a few weeks ago and we had some family over to celebrate.  My husband cooked up a ham and we made a bunch of sides to go with it.  I had some sweet potatoes (from that 5 lb. box I got on sale) that I wanted to use up so I added this to the menu at the last minute.  I'm glad that I did.  Everyone really enjoyed this. It was creamy and sweet.  A perfect side for when you want a change from regular potatoes.
Yummy Sweet Potato Casserole
recipe from allrecipes.com, courtesy of TINA B

Ingredients:
4 cups sweet potato, cubed
1/2 cup white sugar
2 eggs, beaten
1/2 teaspoon salt
4 tablespoons butter, softened
1/2 cup milk
1/2 teaspoon vanilla extract
1/2 cup packed brown sugar
1/3 cup all-purpose flour
3 tablespoons butter, softened
1/2 cup chopped pecans

Directions:
1.Preheat oven to 325 degrees F.  Put sweet potatoes in a medium saucepan with water to cover. Cook over medium high heat until tender; drain and mash.

2.In a large bowl, mix together the sweet potatoes, white sugar, eggs, salt, butter, milk and vanilla extract. Mix until smooth. Transfer to a 9x13 inch baking dish.

3.In medium bowl, mix the brown sugar and flour. Cut in the butter until the mixture is coarse. Stir in the pecans. Sprinkle the mixture over the sweet potato mixture.

4.Bake in the preheated oven 30 minutes, or until the topping is lightly brown.

Family Rating: 2 thumbs up.

Thursday, April 18, 2013

Asian Barbequed Butterflied Leg of Lamb

Okay, these next few days I will be posting and catching up on recipes that I made for Easter. Yes, as usual, I'm behind on my posts! I hosted Easter dinner for my family, including my sister and her husband and children, who traveled up from Maryland.  My husband and I love lamb but we rarely make it. We decided to make it for our Easter dinner since my brother and brother-in-law also really like it.  I tend to lean more towards asian flavors when marinating, as I did when choosing this recipe.  This recipe was super easy.  We put the marinade together and marinated the lamb overnight.  Another plus of this recipe is that it is grilled.  My husband took care of the cooking of this while I was inside cooking up all the side dishes.  This was one of those rare occasions when a double oven would come in really handy!  We all enjoyed this lamb! It was really flavorful and well-cooked.  My husband cooked it perfectly where the ends were more cooked for those, like me, who prefer their meat a little more well done, and the middle was rare, like the way he enjoys it. 

BTW:  My sister is a vegetarian.  Although she's fine eating a meal of side dishes, I try to have a main dish type protein for her.  We ended up doubling this sauce and marinating a block of firm tofu in some of it overnight.  We then quick-fried it in a pan over high heat for a couple minutes on each side.  It was a tasty dish that even us non-vegetarians were eating.  Sadly enough, I did not get a pic of the dish before it was eaten up. 

Asian Barbequed Butterflied Leg of Lamb
recipe adapted from allrecipes.com, courtesy of Cindy

Ingredients:
2/3 cup hoisin sauce
6 tablespoons rice vinegar
1/2 cup minced green onions
1/4 cup soy sauce
4 tablespoons minced garlic
2 tablespoons honey
1/2 teaspoon sesame oil
1/2 teaspoon freshly ground black pepper
1 (5 pound) boneless butterflied leg of lamb

Directions:
1.In a large resealable plastic bag, mix hoisin sauce, rice vinegar, green onions, soy sauce, garlic, honey, sesame oil, and black pepper. Place lamb in bag, seal, and turn to coat. Refrigerate for 8 hours, or overnight.


2.Preheat grill for high heat.

3.Oil the grill grate. Place lamb on the grill, and discard marinade. Cook 15 minutes on each side, to a minimum internal temperature of 145 degrees F (63 degrees C), or to desired doneness. Transfer meat to a serving platter, and allow it to rest for 20 minutes before slicing and serving.

Family Rating: 2 thumbs up!

This post is shared at:
Foodtastic Friday @ Not Your Ordinary Recipes
Tasty Thursdays @ The Mandatory Mooch
Friday, March 29, 2013

Avocado Egg Salad

A couple of weeks ago I realized that I had a lot of eggs in the fridge.  I decided to hard-boil some since I knew that during the week my husband would take some with him to work for breakfast.  I decided to make myself some egg salad for lunch with a few of them.  I remember seeing a post somewhere in blog land using avocado in egg salad.  So I searched allrecipes and found this one.  I thought that this was really flavorful with the addition of the red onion and sweet pickles.  It was a nice change from the traditional egg salad that I normally make.  Note that the ingredient amounts are kind of odd because I ended up halving the original recipe.  This made enough for me to have lunch for two days.

Avocado Egg Salad
Recipe from allrecipes.com - courtesy of ANGELAANDJAKERS

Ingredients:
3 hard-boiled eggs, peeled
1 avocados - peeled, pitted, and cubed
1/4 cup minced red onion
1 tablespoon and 1-1/2 teaspoons chopped sweet pickles
1-1/2 teaspoons prepared yellow mustard
2 tablespoons and 2 teaspoons mayonnaise
salt and pepper to taste

Directions:
Mash the eggs with a fork in a mixing bowl to break up. Add the avocado, onion, pickle, mustard, and mayonnaise. Gently smash the ingredients together until blended. Season to taste with salt and pepper.


My Rating: 1 1/2 thumbs up.

Monday, February 25, 2013

Might Have Missed Monday: Corn and Cheddar Waffles

Re-posting this recipe reminds me that I haven't made waffles in a very long time!  These were a winner with the kids!  They of course love corn, so that helps.  Breakfast for dinner is such an easy, quick, and sure-to-please everyone dinner in our house.  You can keep this a meat-free meal by serving with some fruit, or like I always do, cook up some bacon or sausage to serve with!

Corn and Cheddar Waffles
recipe from All You, August 2011

Cook Time: 7 Minutes
Prep Time: 10 Minutes

Ingredients:
1 cup all-purpose flour
1/2 cup yellow cornmeal
1 1/2 teaspoons baking powder
1/2 teaspoon salt
1 tablespoon sugar
1 1/2 cups milk
1 large egg
4 tablespoons unsalted butter, melted and cooled
1 cup fresh corn kernels (from 1 large ear) or 1 cup frozen corn kernels, thawed
1 cup grated Cheddar

Directions:
1. Preheat oven to 200ºF and preheat waffle iron. In a large bowl, whisk together flour, cornmeal, baking powder, salt and sugar. In a glass measuring cup, whisk together milk, egg and butter. Pour milk mixture into flour mixture and stir until just combined. Fold in corn and cheese.

2. Mist waffle iron with cooking spray. Pour batter onto grates and spread to edges with a spatula. Cook until waffles are golden, 5 to 7 minutes. Transfer to a plate, loosely cover with foil and keep warm in oven. Repeat with remaining batter, misting grates with cooking spray before each new batch.

Family Rating: 2 thumbs up.

This post is being shared at:
Tasty Tuesdays @ 33 Shades of Green
Totally Tasty Tuesdays @ Mandy's Recipe Box
Show Me What you Got Linky Party @ Our Delightful Home

Wednesday, February 6, 2013

The Weekend Chef: Chicken with Mushrooms

This was a recipe that I had planned on making during the week.  My husband ended up being home though and ended up cooking dinner.  I love mushrooms.  Unfortunately, my kids don't.  This was a great dish for us because the kids could easily pick out the mushrooms (after they had their required one bite!). The kids love breaded chicken cutlets, which this basically was, kicked up a little notch with some melted cheese and mushrooms.  Simple and tasty for a quick and easy weeknight meal!
Chicken with Mushrooms
recipe from allrecipes.com, courtesy of KIMPAT

Ingredients:
3 cups sliced mushrooms
4 skinless, boneless chicken breast halves
2 eggs, beaten
1 cup seasoned bread crumbs
2 tablespoons butter
6 ounces mozzarella cheese, sliced
3/4 cup chicken broth

Directions:
1.Preheat oven to 350 degrees F (175 degrees C).

2.Place half of the mushrooms in a 9x13 inch pan. Dip chicken into beaten eggs, then roll in bread crumbs.

3.In skillet, melt butter over medium heat. Brown both sides of chicken in skillet. Place chicken on top of mushrooms, arrange remaining mushrooms on chicken, and top with mozzarella cheese. Add chicken broth to pan.

4.Bake in preheated oven for 30 to 35 minutes, or until chicken is no longer pink and juices run clear.

Family Rating: 1 1/2 thumbs up. 

Wednesday, January 30, 2013

Cheesecake Cups

To know how far behind I am on posting, I made these Cheesecake Cups for dessert for Christmas Eve.  Yes, that was almost a month ago!  Every Christmas Eve we go to my cousin's house in CT.  She asked me to bring dessert.  My other cousin's wife always brings some cookies, so I didn't want to make more.  But I also didn't want to bake a cake.  I ended up making an Eggnog Pie and these Cheesecake Cups.  I know my family loves cheesecake so they would get eaten. I thought that with the cookies and pie, these cups would be small enough that everyone could sample a little bit of everything and not feel like they had to eat a whole piece of cheesecake.  The store was out of regular Nilla Wafers so I ended up buying mini ones and used mini cupcake wrappers.  I left the original recipe amounts and cooking time below though.  These were a hit!  Everyone enjoyed them and they were really easy to make.
Cheesecake Cups
recipe slightly from allrecipes.com, courtesy of LOOPDHERB

Ingredients:
16 vanilla wafer cookies
2 (8 ounce) packages cream cheese, softened
3/4 cup white sugar
2 eggs
1 teaspoon vanilla extract
1 can cherry pie filling
1/2 cup mini chocolate chips

Directions:
1.Preheat oven to 350 degrees F (175 degrees C). Line muffin pans with cupcake papers.

2.Place one wafer cookie in the bottom of each cupcake paper. In a medium bowl, cream together cream cheese and sugar. Beat in eggs and vanilla until smooth. Pour over wafers in cupcake papers.

3.Bake in preheated oven 15 minutes, until golden and set.

4. Add either cherry pie filling or mini chocolate chips to top.

Family Rating: 2 thumbs up.

Monday, December 17, 2012

Might Have Missed Monday: Libby's Pumpkin Cranberry Muffins

Here's a muffin recipe that I made last November that we enjoyed a lot. 

I saw this recipe, which was originally for a bread and decided to make muffins instead. I halved the recipe, only making 12 muffins. I prefer to make muffins because I can freeze some and they make for a quick, easy breakfast on a busy morning. I also used dried cranberries instead of fresh. Next time, I would definitely try to use fresh cranberries. The dried cranberries that I used had an overly sweet taste.


Libby's Pumpkin Cranberry Muffins
recipe adapted from: Very Best Baking

Ingredients:
1 1/2 cups all-purpose flour
2 1/2 teaspoons pumpkin pie spice
1 teaspoons baking soda
3/4 teaspoons salt
1 1/2 cups granulated sugar
1/2 (15 ounce) can LIBBY'S® 100% Pure Pumpkin
2 eggs
1/2 cup vegetable oil
1/4 cup orange juice
1/2 cup dried cranberries

Directions:
1.Preheat oven to 350 degrees F (175 degrees C). Grease and flour 12 muffin pan or use liners.

2.Combine flour, pumpkin pie spice, baking soda and salt in large bowl. Combine sugar, pumpkin, eggs, vegetable oil and orange juice in large mixer bowl; beat until just blended. Add pumpkin mixture to flour mixture; stir just until moistened. Fold in cranberries. Spoon batter into muffin pan.

3.Bake for 20 to 25 minutes or until wooden pick inserted in center comes out clean. Cool in pans on wire racks for 10 minutes; remove to wire racks to cool completely

Family Rating: 2 thumbs up!


Saturday, November 10, 2012

The Weekend Chef: Gnocchi I

Because of Hurricane Sandy and the lack of mass transit down to the city, my husband was home with us for several days.  I needed gnocchi for a recipe that I wanted to make (see tomorrow's post) and had some potatoes that needed to be used up.  I asked my husband if he wanted to help make dinner and he gladly agreed.  He was in charge of making these gnocchi while I got the rest of the dish ready.  I don't make home made pasta....like ever!  It seems like way too much work for what you get.  However, I don't know why we don't make gnocchi more often.  Gnocchi is my husband's favorite patsta (although can you really call it pasta if it's made with potato?!) We've made ricotta gnocchi before but I don't think we've ever made traditional potato gnocchi.  This was really easy to make and tasted so good! Although these would be great with red sauce or even just some butter and cheese, I used them in tomorrow's featured recipe!

Gnocchi I
recipe from allrecipes.com by Anna

Ingredients:
2 potatoes
2 cups all-purpose flour
1 egg

Directions:
1.Bring a large pot of salted water to a boil. Peel potatoes and add to pot. Cook until tender but still firm, about 15 minutes. Drain, cool and mash with a fork or potato masher.

2.Combine 1 cup mashed potato, flour and egg in a large bowl. Knead until dough forms a ball. Shape small portions of the dough into long "snakes". On a floured surface, cut snakes into half-inch pieces.

3.Bring a large pot of lightly salted water to a boil. Drop in gnocchi and cook for 3 to 5 minutes or until gnocchi have risen to the top; drain and serve.  

Family Rating: 2 thumbs up!

Thursday, September 6, 2012

The Weekend Chef: Sausage and Sun-Dried Tomato Quiche

I know it's not the weekend but with my internet down for a couple of days I'm really behind on posts.  Plus, I wanted to share with you this delicious recipe that my husband, a.k.a. "The Weekend Chef" made for our California themed supper club dinner last month.  I think he was stretching it a bit with the sun-dried tomatoes from California bit, but I'm glad he made this because it was delicious!  The salty sausage with the sweet tomatoes....yum! Since refrigerated pie crusts come with two crusts, he ended up doubling the recipe and saving half of the filling mixture and we had this for dinner another night.  It was really that good!  And we discovered that our son likes sun-dried tomatoes! Unfortunately, this does take a bit of time to bake in the oven, but if you premade the filling the night before and just had to bake it this could possibly be a weeknight dinner.  


Sausage and Sun-Dried Tomato Quiche
Recipe from allrecipes.com by Stephanie

Yield: 8 servings

Ingredients:
1 (9 inch) frozen pie crust, thawed
1/2 pound bulk pork sausage
2 shallots, chopped
1 clove clove garlic, minced
1/2 cup chopped sun-dried tomatoes
2 tablespoons chopped fresh parsley
4 eggs
1 cup whipping cream
1 cup shredded mozzarella cheese

Directions:
1.Preheat an oven to 425 degrees F (220 degrees C). Line pie pan with pie crust, and prick several places with a fork. Place a double layer of aluminum foil over the crust. Bake in the preheated oven for 8 minutes, and then remove foil. Continue baking until crust begins to set, about 5 minutes; remove from oven. Reduce oven temperature to 350 degrees F (175 degrees C).

2.In a large skillet, cook sausage until well browned, stirring frequently. Mix in shallots and garlic, and continue cooking for 1 minute. Stir in sun-dried tomatoes and 1 tablespoon parsley. Spread mixture into the bottom of the warm pie crust.

3.In a mixing bowl, beat eggs with cream. Stir in cheese. Pour mixture over sausage in pie crust. Sprinkle remaining parsley over the top.

4.Bake in preheated oven until crust browns and a knife inserted in the center comes out clean, about 45 to 60 minutes.

Family Rating: 2 thumbs up!

Wednesday, August 29, 2012

Texas Ranch Potato Salad

I'm sorry to my husband (and anyone else who reads this blog daily!) for the recent lack of posts.  Unfortunately, we had some internet connection problems and were several days without internet access.  It was actually a nice little mandatory break from the blog for a few days.  But I'm back now with lots of recipes to share.  Even though I couldn't access the internet I was still busy cooking in the kitchen! 

A couple of weeks ago we had some of my husband's old co-workers over for a barbecue.  Along with hotdogs for the kids, marinated london broil, and sausage and pepper wedges we made several salads.  The first was a potato salad.  I'm always looking for new potato salad recipes.  This one had ranch and bacon so I thought it couldn't be bad.  Unfortunately, I forgot to swap some of the mayo for sour cream which I had meant to do.  I knew I had bought sour cream for a reason but couldn't remember what it was for!  And the fact that the potatoes were a bit crunchy and not totally cooked all the way through probably didn't help either.  However, I wasn't a big fan of the flavors and probably won't be making this again. 

Texas Ranch Potato Salad
recipe from allrecipes.com by 8BREAK

Yield:  16 servings

Ingredients:
1 (1 ounce) package ranch dressing mix
2 cups mayonnaise
3/4 cup chopped green onion
1 pound bacon slices
5 pounds unpeeled red potatoes

Directions:
1.Bring a large pot of lightly salted water to a boil. Add whole potatoes, and cook until tender, 15 to 20 minutes. Drain, run under cold water to cool, and chop into 1 inch cubes. Transfer to a large serving bowl, and refrigerate until completely chilled, about 2 hours.

2.In a small bowl, stir together the ranch dressing mix, mayonnaise and green onion. Cover, and refrigerate for about 2 hours to blend flavors.

3.Wrap bacon in paper towels and place on a plate. Cook in the microwave until crisp, about 15 minutes depending on the power of your microwave. Cool.

4.Stir the mayonnaise mixture into the bowl of potatoes. Crumble bacon into the bowl, and stir to distribute. Serve.

Family Rating: So-so.

Wednesday, August 15, 2012

Mouth-Watering Stuffed Mushrooms

It's time again for the Eating The Alphabet Challenge, hosted by Brenda at Meal Planning Magic.  This month's letters were M, N, & or O.  There were just so many veggie, fruit, and grain options to choose from for this month's challenge that it was hard to choose!  I finally decided on stuffed mushrooms.  I love mushrooms in all forms but unfortunately my kids really dislike them.  Although I like stuffed mushrooms I rarely get a chance to eat them.  And I've never made them until now!  Knowing the kids wouldn't eat these I ended up making them as an afternoon snack for myself.  They were surprisingly easy to make.  I had always assumed that they took a lot of work to prepare, one of the reasons why I never made them.  This recipe that I found did not use bread crumbs.  I think that the stuffed mushrooms that I've had and enjoyed in the past used them, so these weren't totally satisfying.  But now that I know how easy stuffed mushrooms can be to make I'll definitely be trying out new variations in the future.

Mouth-Watering Stuffed Mushrooms
recipe from allrecipes.com by Angie Gorkoff

Ingredients:
12 whole fresh mushrooms
1 tablespoon vegetable oil
1 tablespoon minced garlic
1 (8 ounce) package cream cheese, softened
1/4 cup grated Parmesan cheese
1/4 teaspoon ground black pepper
1/4 teaspoon onion powder
1/4 teaspoon ground cayenne pepper

Directions:
1.Preheat oven to 350 degrees F (175 degrees C). Spray a baking sheet with cooking spray. Clean mushrooms with a damp paper towel. Carefully break off stems. Chop stems extremely fine, discarding tough end of stems.

2.Heat oil in a large skillet over medium heat. Add garlic and chopped mushroom stems to the skillet. Fry until any moisture has disappeared, taking care not to burn garlic. Set aside to cool.

3.When garlic and mushroom mixture is no longer hot, stir in cream cheese, Parmesan cheese, black pepper, onion powder and cayenne pepper. Mixture should be very thick. Using a little spoon, fill each mushroom cap with a generous amount of stuffing. Arrange the mushroom caps on prepared cookie sheet.

4.Bake for 20 minutes in the preheated oven, or until the mushrooms are piping hot and liquid starts to form under caps.

Mommy & Daddy rating: So-so.  


Saturday, August 11, 2012

Around the World: Vegetable Lo Mein (The Weekend Chef)

I have to admit this is a recipe that I've made before.  Many years ago, but nonetheless, I have made this.  My husband, "The Weekend Chef" wanted to make a noodle dish to go with the pork tenderloin he was making (see tomorrow's post).  I remember making this dish and it having a sweet and tasty sauce.  I didn't remember the recipe having a little heat, which my daughter didn't like! We adapted the recipe to use a can of baby corn and straw mushrooms that we found in our cabinets! Although probably not authentic Chinese, we enjoyed this tasty noodle dish.

Vegetable Lo Mein
recipe adapted from allrecipes.com by ANGCHICK

Ingredients:
8 ounces uncooked spaghetti
1/4 cup vegetable oil
1 can straw mushrooms
1 can baby corn
1 cup shredded carrots
1 onion, chopped
2 cloves garlic, minced
1/2 cup chopped green onions
1 tablespoon cornstarch
1 cup chicken broth
1/4 cup hoisin sauce
2 tablespoons honey
1 tablespoon soy sauce
1 teaspoon grated fresh ginger
1/4 teaspoon cayenne pepper
1/4 teaspoon curry powder

Directions:
1.Bring a large pot of lightly salted water to a boil. Add pasta and cook for 8 to 10 minutes or until al dente; drain.

2.Heat oil in a large wok or saute pan. Stir fry mushrooms, carrots, corn, onion and garlic until tender. Stir in green onions; cook one minute. Mix cornstarch and chicken broth in a small bowl and add to stir fry. Stir in hoisin sauce, honey, soy sauce, ginger, cayenne pepper and curry powder. Cook and stir until thickened and bubbly.

3.Add cooked spaghetti, and toss. Serve immediately.

Family Rating: 1 1/2 thumbs up.

Tuesday, July 31, 2012

Chocolate Zucchini Muffins

It's time again for another muffin recipe.  Muffins and yogurt are a breakfast staple in our house.  The kids have that combo at least once a week.  I try to mix up the breakfast menu so they don't have the same breakfast every day.  One morning I'll give them cereal, another morning bagels, and once a week muffins and yogurt!  While I'm not a big fan of chocolate muffins for breakfast I thought it helped that these had zucchini!  The original recipe, which I've linked to below, had spices like nutmeg, cloves, and cardamom.  I wanted to keep the muffin more chocolatey than spice flavored so I left those out.  These muffins were super moist and tasty!


Chocolate Zucchini Muffins
recipe adapted from allrecipes.com by Larry B

Ingredients:
3 eggs
2 cups white sugar
1 cup vegetable oil
1/3 cup unsweetened cocoa powder
1 1/2 teaspoons vanilla extract
2 cups grated zucchini
3 cups all-purpose flour
1 teaspoon baking soda
1/2 teaspoon baking powder
1 teaspoon salt
1/4 teaspoon ground cinnamon

Directions:
1.Preheat oven to 350 degrees F (175 degrees C). Lightly grease or line two 12 cup muffin tins with paper liners.

2.In a large bowl beat the eggs. Beat in the sugar and oil. Add the cocoa, vanilla, zucchini and stir well.

3.Stir in the flour, baking soda, baking powder, salt, and cinnamon. Mix until just moist.

4.Pour batter into prepared muffin tins filling 2/3 of the way full. Bake at 350 degrees F (175 degrees C) for 20 to 25 minutes. Remove from pan and let cool on a wire rack. Store loosely covered.

Family Rating: 2 thumbs up!

Thursday, July 26, 2012

Carrot Cake III with Whipped Cream Cheese Frosting

Back when I was teaching, I discovered that my co-teacher loved carrot cake.   The first year that I was teaching with her I made her a homemade carrot cake that she loved!  Since then, it became a tradition that I made her a carrot cake every year for her birthday.  When I was asking my son what kind of dessert he wanted for his birthday his response was "a carrot cake with a race car on it."  I wasn't even sure that he had ever eaten carrot cake before, but he was adamant about his request.  So carrot cake it was.  After trying out different recipes, this one has been my go-to recipe for the annual carrot cake.  This is definitely not a "light" recipe but the cake turns out really moist!  The recipe for the cake that I posted below came with a cream cheese icing recipe (click on the origial recipe link to see it).  I posted below the cake recipe the icing recipe that I used.  I had used the whipped cream cheese frosting for another recipe and loved it and decided to use it for the cake.  I think that half of the icing ended up in my tummy but I made sure that I left plenty to ice the cake.   My husband, who is way  more artistic than I am, did the car decorating!  My son really enjoyed the cake and I was glad we could honor his request. 

Carrot Cake III
Recipe slightly adapted from allrecipes.com by Tammy Elliott

Ingredients:
4 eggs
1 1/4 cups vegetable oil
1 cup white sugar
1 cup  brown sugar
2 teaspoons vanilla extract
2 cups all-purpose flour
2 teaspoons baking soda
2 teaspoons baking powder
1/2 teaspoon salt
2 teaspoons ground cinnamon
3 cups grated carrots

Directions:
1.Preheat oven to 350 degrees F (175 degrees C). Grease and flour a 9x13 inch pan.

2.In a large bowl, beat together eggs, oil, sugar and 2 teaspoons vanilla. Mix in flour, baking soda, baking powder, salt and cinnamon. Stir in carrots. Pour into prepared pan.

3.Bake in the preheated oven for 40 to 50 minutes, or until a toothpick inserted into the center of the cake comes out clean. Let cool in pan for 10 minutes, then turn out onto a wire rack and cool completely.
 
Whipped Cream Cheese Frosting:
Recipe from allrecipes.com by Tom
 
Ingredients:
1 (8 ounce) package cream cheese
1 cup white sugar
1/8 teaspoon salt
1 teaspoon vanilla extract
1 1/2 cups heavy whipping cream

Directions:
1.In a small bowl beat whipping cream until stiff peaks form; set aside.

2.In a large bowl combine cream cheese, sugar, salt and vanilla. Beat until smooth, then fold in whipped cream.

Family Rating: 2 thumbs up.

Wednesday, July 25, 2012

Sesame Noodle Salad

Last, I was looking for a carby side dish for the party.  I thought about a potato salad with a vinegarette type dressing but finally decided to do a pasta type dish.  I liked the idea of a Sesame Noodle Salad because it can be served either warm or cold.  It was super easy to make and really tasty!  This side dish had the least amount of leftovers!  My kids were big fans of this dish.  I would definitely make this dish again.

Sesame Noodles
Recipe slightly adapted from allrecipes.com by jkmom

Ingredients:
1 (16 ounce) package angel hair pasta
1/2 cup sesame oil
1/2 cup soy sauce
1/4 cup balsamic vinegar
1/4 cup white sugar
1 teaspoon sesame seeds, or more if desired
1 green onion, chopped
1/2  red bell pepper, diced

Directions:
1.Fill a large pot with lightly salted water and bring to a rolling boil over high heat. Once the water is boiling, stir in the angel hair pasta, and return to a boil. Cook the pasta uncovered, stirring occasionally, until the pasta has cooked through, but is still firm to the bite, 4 to 5 minutes. Drain well in a colander set in the sink.

2.Whisk together the sesame oil, soy sauce, balsamic vinegar, and sugar in a large bowl. Toss the pasta in the dressing, then sprinkle with sesame seeds, green onion, and bell pepper. Serve warm, or cover and refrigerate for a cold salad.

Family Rating: 1 1/2 thumbs up.

Tuesday, July 24, 2012

Tangy Cucumber Salad

I grew up with my mom making a marinated cucumber salad using rice vinegar.  I have made this similar salad numerous times and the kids seem to enjoy it.  I was looking for something different for the party though and found this recipe.  It also used tomatoes which I thought was a nice addition, although I was disappointed the tomatoes from my own plants weren't ripe enough to use.  This salad was light and refreshing but I wasn't totally wowed by it. After a day everything got kind of mushy in the leftover juices/marinade and wasn't very appetizing.

Tangy Cucumber Salad
Recipe from allrecipes.com by Edna Hoffman

Ingredients:
2 small cucumbers, thinly sliced
1 teaspoon salt, divided
2 medium tomatoes, chopped
1 medium onion, chopped
1/4 cup cider vinegar
2 tablespoons vegetable oil
1 tablespoon honey
1/2 teaspoon celery salt
1/2 teaspoon dried basil
1/2 teaspoon ground mustard
1/4 teaspoon garlic powder
1/4 teaspoon dried oregano
dash cayenne pepper

Directions
1.Place cucumbers in a strainer; sprinkle with 1/2 teaspoon of salt and toss. Let stand for 30 minutes. Rinse and drain well. Place in a large bowl; add tomatoes and onion. In a small bowl; add tomatoes and onion. In a small bowl, whisk together the remaining ingredients; pour over cucumber mixture and toss. Cover and refrigerate for several hours. Serve with a slotted spoon.

Family Rating: 1 thumb up.

Friday, July 6, 2012

Brazilian Collards

Although we don't eat them or cook them very much my husband and I like collard greens.  He's made them before with some of his yummy fried chicken.  I thought that I'd try them out in this recipe.  I ended up halving the recipe, which originally called for 6 servings.  I knew the kids wouldn't be big fans and I didn't want a lot of leftovers.  Leftover collards definitely don't taste as good the next day!  I didn't halve the amount of bacon though because we all LOVE bacon!  You can never have too much of the stuff, right?!  And of course this is the recipe out of the three on my crazy night of cooking that I saved to make last.  I didn't really pre-read the recipe (again!) and of course the original recipe called for cooking an hour and 15 minutes!  Everything else was pretty much done at this point....I was not cooking these for an hour!  It ended up being about thirty minutes give or take.  Regardless, I thought that these came out really good!  Even my daughter asked for seconds (although I think she really just wanted more bacon!).  I don't know how Brazilian this recipe is.....I did omit the cayenne pepper the original recipe called for to make this child-friendly.  I would definitely make this dish again though. 

Brazilian Collards
recipe adapted from allrecipes.com - by Javagoddess
original recipe click here

Yields: 3 servings

Ingredients:
1/2 pound peppered bacon, diced
1/2 onion, chopped
1 pounds collard greens - rinsed, stemmed and torn into 3x6 inch pieces
1/2  cup chicken stock
1 tablespoons red wine vinegar

Directions:
1.Place bacon in a large heavy-bottomed pot over medium-high heat. Cook until browned and most of the grease has been released. Stir in onion and cook until tender and glistening, about 4 minutes.

2.Place collards into the pot and stir to coat with the bacon drippings. Pour in the chicken stock. Reduce heat to low and cook for 20 minutes.

3.Stir red wine vinegar into the pot. Continue cooking 10 minutes, until liquid is reduced by about 1/2.

Family Rating: 1 1/2 thumbs up.

Thursday, July 5, 2012

Around The World: Pork and Black Bean Stew

This recipe was made on a night when I was making two other dishes -Brazilian Collards and Brazilian Potato Salad (see upcoming posts!).  It was a little crazy in the kitchen that night.  I spent about an hour and a half cooking only to have my kids....okay, mostly my son, not eat anything.  I was also going to the gym that night after my husband got home from work so I only took a taste of each dish when plating for the kids, since I didn't want to work out on a full stomach!  So I ended up eating dinner at around 9 PM.  This dish turned out more like a soup than a stew.  The flavors were good, even with the black beans, which I'm not a huge fan of.  I liked the addition of chorizo, since I don't often cook or eat it.  I could see this being a good meal on a chilly fall or winter day. Over the summer in 90+ degree heat.....not so much!

Pork and Black Bean Stew
recipe from allrecipes.com by MICHELLE0011

Yield: 4 Servings

Ingredients:
2 tablespoons vegetable oil
1 teaspoon minced garlic
1 large onion, chopped
1 (12 ounce) pork tenderloin, cut into 1/2 inch cubes
1 (19 ounce) can black beans, drained and rinsed
1/4 cup water
1 1/2 cups chicken stock
3 chorizo sausages, cut into 1/2 inch thick pieces
2 bay leaves
salt and pepper to taste

Directions:
1.Heat 1 tablespoon vegetable oil in a skillet over medium heat, stir in garlic and onion, and cook a few minutes until the onion softens and turns translucent. Remove the onion, and place into a saucepan. Pour the remaining 1 tablespoon vegetable oil into the skillet, and place over medium-high heat. Add cubed pork, and cook until well browned.

2.Meanwhile, pour 3/4 of the black beans along with 1/4 cup water into the bowl of a blender, and pulse until finely chopped, but not quite smooth. Pour whole beans and bean puree into saucepan along with pork cubes, chicken stock, chorizo, and bay leaves. Bring to a boil over medium-high heat, then reduce heat to medium-low, cover, and simmer 30 minutes. Season to taste with salt and pepper before serving.

Family Rating: 1 thumb up.

Sunday, July 1, 2012

Around the World: Brazilian Chicken with Coconut Milk

When going through recipes in preparation for Brazil, my daughter requested a chicken dish.  I found most of the recipes online, mostly from allrecipes.com.  They either had "Brazilian" in the title, like this recipe, or had reviews by people of Brazilian heritage.  Therefore, I cannot validate the authenticity of these recipes as being truly Brazilian.

Most of the Brazilian recipes that I found and made called for cayenne pepper and/or jalapeno peppers.  To make the dishes child-friendly I omitted those ingredients.  Unfortunately, by omitting those ingredients I think I took away a lot of the flavor, which I think was sadly the problem in this recipe.  I have to say this dish was quick and easy to make.  I served it with Arroz Branco (see tomorrow's recipe) and Oven Baked Sweet Plantains (see Tuesday's recipe).  I think with the cayenne pepper and jalapenos that the original recipe called for this dish might be tasty.

Brazilian Chicken with Coconut Milk
recipe slightly adapted from allrecipes.com - by MLYIN

Ingredients:
1 teaspoon ground cumin
1 teaspoon ground turmeric
1 teaspoon ground coriander
4 skinless, boneless chicken breast halves
salt and pepper to taste
2 tablespoons olive oil
1 onion, chopped
2 cloves garlic, minced
3 tomatoes, seeded and chopped
1 (14 ounce) can coconut milk

Directions:
1.In a medium bowl, mix the cumin, turmeric, and coriander. Place the chicken in the bowl, season with salt and pepper, and rub on all sides with the spice mixture.

2.Heat 1 tablespoon olive oil in a skillet over medium heat. Place the chicken in the skillet. Cook 10 to 15 minutes on each side, until no longer pink and juices run clear. Remove from heat and set aside.

3.Heat the remaining olive oil in the skillet. Cook and stir the onion and garlic 5 minutes, or until tender. Mix in the tomatoes and continue cooking 5 to 8 minutes. Stir in the coconut milk. Serve over the chicken.

Family Rating: So-so.

Wednesday, June 13, 2012

Blueberry Sour Cream Coffee Cake

Earlier this week I used some sour cream for the Hot Dog Goulash and wanted to use the rest up before it went to waste.  I had bought a carton of blueberries at the grocery store so I thought this cake would be perfect.....and it was!  I prefer to make breakfast baked goods since my kids love breakfast so much! When I make dessert type baked goods, I often have to freeze half of them or they end up going bad.  We just don't eat them fast enough!  So, I made this cake and it was so tasty!  It was baking while we were eating dinner.  The cinnamony aroma had us drooling with anticipation.  Eating this warm out of the oven, it was amazing!  This was one breakfast treat that was eaten all up!


Blueberry Sour Cream Coffee Cake
recipe slightly adapted from allrecipes.com - by d newman

Ingredients:
1 cup butter, softened
2 cups white sugar
2 eggs
1 cup sour cream
1 teaspoon vanilla extract
1 5/8 cups all-purpose flour
1 teaspoon baking powder
1/4 teaspoon salt
1 cup fresh or frozen blueberries
1/2 cup brown sugar
1 teaspoon ground cinnamon

Directions:
1.Preheat the oven to 350 degrees F (175 degrees C). Grease and flour a 9 inch Bundt pan.

2.In a large bowl, cream together the butter and sugar until light and fluffy. Beat in the eggs one at a time, then stir in the sour cream and vanilla. Combine the flour, baking powder, and salt; stir into the batter just until blended. Fold in blueberries.

3.Spoon half of the batter into the prepared pan. In a small bowl, stir together the brown sugar, cinnamon and pecans. Sprinkle half of this mixture over the batter in the pan. Spoon remaining batter over the top, and then sprinkle the remaining pecan mixture over. Use a knife or thin spatula to swirl the sugar layer into the cake.

4.Bake for 55 to 60 minutes in the preheated oven, or until a knife inserted into the crown of the cake comes out clean. Cool in the pan over a wire rack. Invert onto a serving plate, and tap firmly to remove from the pan. Dust with confectioners' sugar just before serving.

Family Rating: 2 thumbs up!